Kayak Anchor: A Complete Guide for Every Kayaker
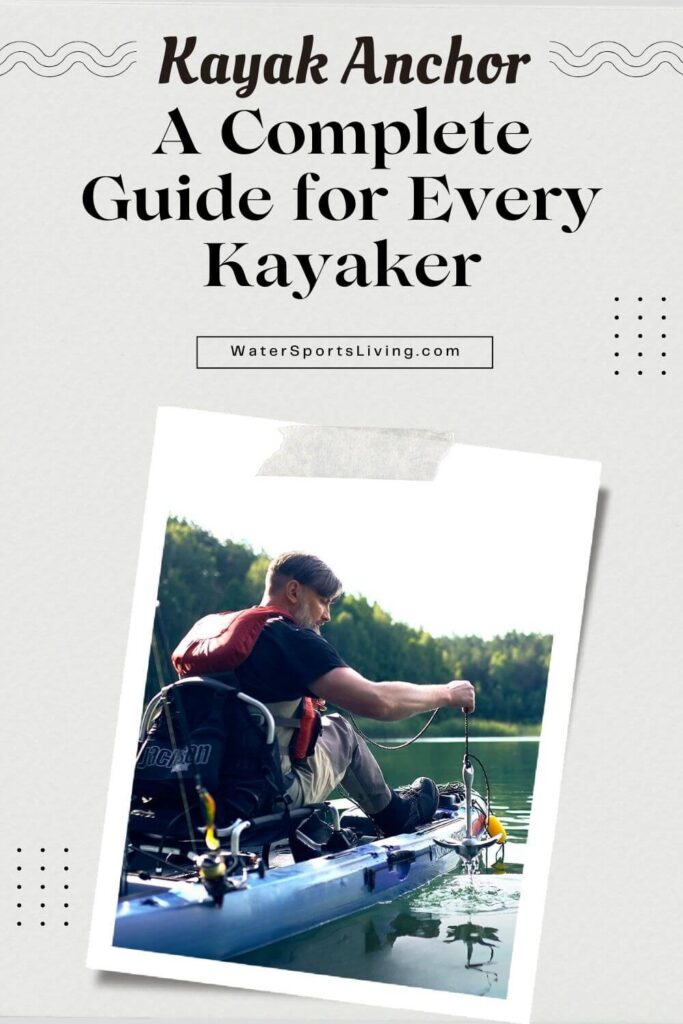
If you’re diving into the world of kayaking or have been paddling for a while, you might have questioned the need for a kayak anchor. Isn’t the whole idea of kayaking to float and move freely? Well, as much as I adore that sensation of drifting on the water’s surface, there are times when anchoring down becomes invaluable. Allow me to take you through this anchor-filled journey!
The Basics of Kayak Anchoring
At its core, a kayak anchor is a weight used to keep your boat stationary in water. Unlike the massive anchors you see on ships and larger boats, these are scaled down to be suitable for kayaks. But don’t let their size fool you! Despite being compact, they’re designed to grip the seafloor or riverbed efficiently, ensuring your kayak stays where you want it. It is your kayak’s very own parking brake. Let’s learn more about them.
What is a Kayak Anchor?
A kayak anchor is a weight specially designed to keep your lightweight watercraft stationary in aquatic environments. These aren’t just random weights; they are engineered for maximum grip on various types of underwater surfaces like sand, mud, rocks, and even aquatic plants. The design typically includes flukes or prongs that dig into the bottom surface, effectively fixing your kayak in place.
Most kayak anchors weigh between 1.5 to 4 pounds. They come in various shapes and materials, and some are even foldable for easy storage. They usually include a length of rope, known as the anchor line, often equipped with a float and clips for easy retrieval.
Here’s a deeper dive into its components:
- Anchor Body: This is the weighty part that sinks and grabs onto the underwater surface. Materials commonly used for the anchor body include galvanized steel, aluminum, and sometimes even plastic for temporary anchoring.
- Flukes/Prongs: These are the arms that extend from the anchor body. Their purpose is to dig into the sea or riverbed, providing the grip that keeps you stationary. The number of flukes can vary, but three or four is standard.
- Anchor Line: This is the rope that connects your kayak to the anchor. It’s usually made from marine-grade material to resist decay and wear. The length of the anchor line will depend on the depth of the water you’re in. A good rule of thumb is to have a line about three times longer than the water is deep.
- Buoy/Buoy Ball: Some kayak anchors come with a buoy or buoy ball attached to the anchor line. This makes it easier to locate and retrieve your anchor.
- Carabiner or Anchor Trolley: These are attachment mechanisms that make it simple to affix the anchor line to your kayak. Some advanced setups allow you to change the point of attachment, offering better control over your kayak’s orientation while anchored.
Why Use an Anchor While Kayaking?
You might wonder why you’d want to stay in one place when the beauty of kayaking is all about exploring. Trust me, a kayak anchor isn’t just a piece of heavy metal; it’s a gateway to numerous opportunities on the water. Here are some compelling benefits:
- Precision Fishing: Anchoring your kayak provides the stability needed to aim and cast accurately, increasing your chances of a rewarding catch.
- Hands-Free Operation: Want to take photos, jot down notes, or simply enjoy your coffee? An anchor keeps you steady, freeing up both hands for other activities.
- Safety: In rough conditions, an anchor can stabilize your kayak, providing a greater level of safety.
- Consistent Scenic Views: Found a spot with a jaw-dropping sunset view? Anchor down to enjoy it for as long as you want without drifting away.
- Rest and Relaxation: Whether you need to stretch, hydrate, or even take a quick nap, anchoring provides the pause you need during long journeys.
- Strategic Paddling: Anchoring can help you conserve energy by preventing constant repositioning in strong winds or currents.
- Better Bird Watching and Wildlife Observation: When you’re stationary, you’re less likely to scare away wildlife, making for an optimal observation experience.
- Convenience: Need to answer a phone call, grab something from your kayak’s storage, or switch gear? It’s easier to do this when anchored.
- Enhanced Snorkeling or Diving: If you love diving off your kayak, an anchor will keep your vessel from drifting away while you explore underwater.
- Socializing: Kayaking with friends? Anchoring makes it easy to gather everyone in one spot for group activities or conversations.
So, while the idea of anchoring might initially seem counter to the adventurous spirit of kayaking, it’s all about giving you more freedom to do what you love on the water. Anchoring your kayak enriches your aquatic adventures, making each trip more versatile, comfortable, and safe.
Types of Kayak Anchors
Anchoring isn’t a one-size-fits-all deal. Different kayak anchors serve different purposes, and the best choice depends on factors like water conditions, kayak type, and what you plan to do while anchored. Let’s take a look at the popular types of kayak anchors along with their pros and cons.
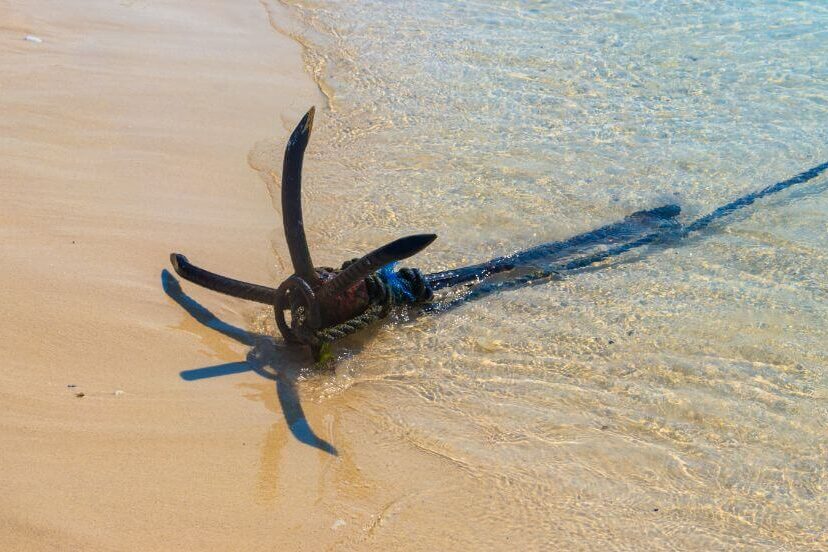
Grapnel Anchors
The All-Rounder: Grapnel anchors are the most commonly used among kayakers due to their versatility.
Description: Grapnel anchors resemble a four-armed grappling hook that can fold inward for easy storage.
Pros:
- Versatility: Effective in various bottom conditions such as mud, sand, gravel, and rocks.
- Compact: Most models are foldable, saving storage space.
Cons:
- Weight: Generally heavier than other types.
- Snags: Tends to get stuck, making it difficult to retrieve in some conditions.
Mushroom Anchors
The Lightweight Option: Mushroom anchors are named for their shape and are generally used in calm, shallow waters.
Description: This anchor type has a bell-shaped design, similar to an upside-down mushroom cap, often used for small boats and kayaks.
Pros:
- Lightweight: Ideal for short trips and shallow waters.
- Easy Storage: The simple shape makes it easy to stow.
Cons:
- Limited Grip: Less effective in strong currents and winds.
- Specific Use: Only good for soft bottoms like mud or silt.
Stake-Out Poles
The Shallow Water Specialist: Stake-out poles are more like a rod than a traditional anchor and are perfect for shallow water scenarios.
Description: These are long, slender rods made of durable materials like fiberglass or aluminum, designed to be manually pushed into soft bottoms.
Pros:
- Quick Setup: Easy to plant into the ground.
- Ideal for Shallow Waters: Great for depths of a few feet or less.
Cons:
- Limited Depth: Ineffective in deep water.
- Manual Effort: Requires physical effort to set and unset.
Bruce/Claw Anchors
The Reliable Gripper: Bruce or Claw anchors are known for their strong grip, making them great for a variety of bottoms.
Description: Bruce or Claw anchors have three evenly spaced claws and a shank, resembling a clawed hand reaching out.
Pros:
- Strong Grip: Excellent holding power in most bottom types.
- Stable: Less likely to roll on the seafloor.
Cons:
- Heavy: Generally weighty and bulky.
- Complicated: More complex to set up than other anchor types.
Danforth Anchors
The Sandy Bottom Expert: Danforth anchors excel in sandy and muddy bottoms due to their high holding power.
Description: Danforth anchors feature long, flat flukes set at a right angle to the shank.
Pros:
- High Holding Power: Great for sandy and muddy bottoms.
- Lightweight: Typically lighter than other types with the same holding power.
Cons:
- Limited Use: Not suitable for rocky or grassy bottoms.
- Storage: Takes up more space due to its flat design.
Plow Anchors
The Versatile Heavy-Duty: Plow anchors are shaped like a plowshare and offer a good grip in multiple bottom types.
Description: Shaped like a farmer’s plow, this anchor has a single, heavy fluke that digs into the sea floor.
Pros:
- Versatile: Good for various bottom types including sand, mud, and grass.
- Easy to Retrieve: Generally easier to pull up than grapnel anchors.
Cons:
- Weight: Quite heavy.
- Size: Not as compact as other options.
River Anchors
The Current Master: River anchors are designed specifically for river currents and are ideal for kayakers who prefer fast-flowing waters.
Description: A river anchor typically features multiple flukes and a central shank, designed to catch onto rocks, roots, or other underwater structures.
Pros:
- Strong Grip: Designed to hold well in fast currents.
- Adaptable: Can grip various types of river bottoms.
Screw Anchors
The Earth Driller: Screw anchors literally screw into the ground, making them highly secure but also very specific in their use.
Description: This anchor type looks like a giant corkscrew and is twisted manually into soft or muddy bottoms.
Pros:
- Highly Secure: Once it’s in, it’s in.
- Environmental: Minimal impact on sensitive bottoms.
Cons:
- Manual Installation: Requires effort to screw into the ground.
- Very Specific Use: Only useful in soft, penetrable bottoms like mud or sand.
Pyramid Anchors
The Weighty Titan: These anchors are heavy and rely on weight rather than design to hold the kayak in place.
Description: True to their name, pyramid anchors have a pyramidal shape and are heavy, designed to sink quickly into the bottom.
Pros:
- Simple Design: Just drop it in, and the weight does the rest.
- Strong Hold: Great for stronger currents and winds.
Cons:
- Heavy: Not ideal for long paddles where you have to carry it.
- Limited Versatility: Not effective in rocky or heavily weeded areas.
Sand Anchors
The Beach Buddy: Sand anchors are designed for sandy bottoms and are often inflatable or bag-style anchors filled with sand.
Description: These anchors usually consist of a bag or sack that can be filled with sand, serving as a weight to hold the kayak in place.
Pros:
- Lightweight: When empty, they weigh next to nothing.
- Easy to Store: Deflate or empty the sand, and it’s super compact.
Cons:
- Limited Use: Only good for sandy bottoms.
- Potential for Leaks: Inflatable models can puncture.
Drogue Anchors
The Drifter’s Choice: Unlike traditional anchors, a drogue anchor slows down your drift rather than stopping you completely, often used for trolling.
Description: A drogue anchor resembles a water-resistant parachute or cone.
Pros:
- Controlled Drift: Allows for a slower, more controlled drift.
- Easy Storage: Usually made of fabric and easy to stow.
Cons:
- Not for Stopping: You will continue to drift, albeit slowly.
- Manual Adjustment: Requires frequent checking and adjusting.
How to Choose the Right Kayak Anchor
When it comes to choosing the perfect kayak anchor, the devil is in the details. We’re not just talking about knowing the difference between a mushroom anchor and a grapnel anchor. I mean understanding the specifications like weight, size, material, and how versatile it is for different kayaking conditions.
Weight and Size
Anchors by the Pound
- 1.5 to 2.5 lbs: Ideal for calm waters, like lakes or slow-moving rivers. Not recommended for winds above 10 mph or currents above 1 knot.
- 3 to 4 lbs: Suitable for slightly choppier conditions, including mild ocean currents or winds up to 20 mph.
- 5 lbs and above: Recommended for extreme kayaking in fast currents, strong winds, or heavy tides.
Size Considerations
- Foldable Grapnel Anchors: When folded, these can be as compact as 12 inches by 3 inches, easily fitting into most kayak storage compartments.
- Mushroom Anchors: A 5-pound mushroom anchor could have a diameter of about 8 inches, so make sure you have ample storage space.
Material
Commonly Used Materials
- Galvanized Steel: Heavier but highly durable. Resistant to rust and good for saltwater use. Weights typically range from 3 to 10 lbs.
- Aluminum: Lighter, weights range from 1 to 4 lbs. Good for freshwater but can corrode over time in saltwater.
- Plastic/Stake-Out Poles: These are lightweight, often under a pound, and great for soft bottoms in shallow waters.
Material Lifespan
- Galvanized Steel: Can last several years with proper care.
- Aluminum: Generally has a shorter lifespan, especially in saltwater conditions.
- Plastic/Stake-Out Poles: May need replacing every season if used frequently.
Versatility
Number of Conditions Served
- Grapnel Anchors: These are the Swiss Army Knives of kayak anchors. They’re generally effective in 4 out of 5 types of bottoms—sand, mud, gravel, and rock—but may struggle with very soft, silty bottoms.
- Mushroom Anchors: Good for two types of bottoms: mud and sand.
- Danforth Anchors: Effective in 3 types of bottoms—sand, mud, and gravel—but not ideal for rocky or weedy conditions.
Versatility Index
- Highly Versatile: Grapnel anchors and Plow anchors. Useful in multiple water conditions and types of bottoms.
- Moderately Versatile: Danforth anchors and Bruce/Claw anchors. Good for several but not all conditions.
- Less Versatile: Mushroom anchors and Stake-Out Poles. Best for specialized conditions like soft bottoms or shallow waters.
Using Your Kayak Anchor Safely
Anchoring isn’t just about choosing the right type of kayak anchor; it’s also about using it correctly and safely. No matter how good your anchor is, if you don’t use it properly, you’re inviting trouble. Here, we’ll go over the important aspects of securing your kayak anchor and knowing when it’s appropriate to use it.
Secure the Kayak Anchor Properly
Before you even think of dropping your anchor into the water, you need to make sure it’s secured to your kayak the right way. Trust me; you don’t want to lose an anchor—or worse, capsize—because you didn’t secure it well.
Steps for Securing Your Anchor:
- Anchor Trolley: Using an anchor trolley system gives you flexibility in positioning your anchor. It allows you to set your anchor off the bow or stern, not just the side, which is essential in strong currents or winds.
- Knots Matter: Use a strong, secure knot to attach the anchor line to your anchor and kayak. The bowline knot or anchor hitch are solid choices.
- Check the Depth: Use a depth finder or a marked anchor line to ensure you’re anchoring in an appropriate depth. A general rule is to use a rope that’s at least three times longer than the water is deep.
- Anchor Chain: An additional 1-2 feet of chain between the anchor and the rope can provide extra holding power, especially in strong currents.
- Give It a Test: Before you rely on it in a tricky situation, test the anchor close to the shore or in shallow water to make sure it holds.
- Always Have a Quick Release: Whether it’s a float or a quick-release knot, have a system in place to quickly detach the anchor in case of emergency.
Know When to Use Your Kayak Anchor
Just because you have an anchor doesn’t mean you should use it all the time. Knowing when to drop anchor can be just as important as knowing how to do it.
Ideal Scenarios for Anchoring:
- Fishing: Anchoring can keep you over that prime fishing spot for extended periods.
- Photography: Need to hold steady for that perfect shot? An anchor can help.
- Resting: Sometimes, you just want to float without drifting. Drop anchor and relax.
- Emergency Situations: Strong winds or currents might necessitate an anchor drop to prevent being pulled into a dangerous area.
When Not to Use Your Anchor:
- High Traffic: Avoid anchoring in high-traffic areas where you might pose a hazard to other watercraft.
- Deep Water: Unless you have an exceptionally long anchor line, anchoring in very deep water is often impractical.
- Stormy Conditions: In extreme weather conditions, an anchor can make matters worse, not better.
Maintenance and Storage
Think of your kayak anchor as a trusted friend. The better you treat it, the better it’ll treat you—especially when you’re out on the water, relying on it to hold you steady in the currents and winds. Here’s how you can keep it well-maintained for many years to come.
Regular Cleaning
You wouldn’t let your fishing gear get all rusty and crusty, would you? The same goes for your anchor.
- Freshwater Rinse: After each kayaking adventure, make it a habit to rinse off your anchor with fresh water. This is crucial for removing salt, sand, and grime that can accelerate wear and tear.
- Deep Cleaning: Once a month, or after an especially grueling kayaking trip, soak your anchor in a vinegar and water solution for about an hour. This helps dissolve stubborn calcium and rust deposits.
- Scrub: Use a stiff brush to remove stubborn dirt or rust. For metal anchors, a wire brush can be particularly effective.
Routine Inspection
Before and after each use, make it a habit to inspect your anchor meticulously.
- Check for Wear: Look for visible signs of corrosion, rust, or fraying on the ropes. Any of these could be a sign your anchor needs replacing or repair.
- Moving Parts: If your anchor has moving parts like a grapnel or claw anchor, ensure they move freely and are not jammed or rusted. A stuck part could mean your anchor won’t set properly.
- Look for Damage: Small cracks, bends, or other deformities can compromise the anchor’s holding power.
Seasonal Maintenance
Once a year, preferably before the start of kayaking season, do a complete overhaul.
- Replace Ropes: If your ropes show signs of fraying or other damage, replace them.
- Lubrication: Apply a rust-preventative lubricant to moving parts to ensure they operate smoothly.
- Professional Inspection: For high-end anchors, consider a professional inspection to ensure optimal performance.
Storage
The way you store your kayak anchor when it’s not in use can significantly affect its lifespan.
- Dry Before Storing: Always make sure your anchor is completely dry before storing it. Moisture is a recipe for rust.
- Proper Bag: Use a ventilated, durable bag designed for anchor storage. This will protect it from the elements and make it easy to transport.
- Avoid Direct Sunlight: UV rays can weaken ropes over time, so store your anchor in a cool, shaded area.
- Regular Checks: Even when not in use, periodically check your stored anchor for any signs of deterioration.
Conclusion
There you have it, a complete guide to kayak anchors. From the basics to the types of anchors and how to choose the right one for you, we’ve covered it all. Proper anchoring can transform your kayaking experience from good to fantastic. Remember, the anchor you choose is as important as how you use it. Always prioritize safety and know when to drop anchor and when to paddle on. And don’t forget, a well-maintained kayak anchor is a long-lasting anchor. Happy kayaking!
FAQs
Q: Can I use any rope for my kayak anchor?
A: While you can technically use any strong rope, it’s advisable to use marine-grade ropes that resist saltwater corrosion.
Q: What is the minimum length of rope I should have?
A: A general rule is to have a rope that’s at least three times the depth of the water you’ll be anchoring in.
Q: Do I need different anchors for different activities?
A: It’s a good idea to have different types for different conditions and activities. For example, a grapnel anchor is good for fishing, while a drogue anchor is better for drift fishing.
Q: Can I make a DIY anchor?
A: While it’s possible, remember that a poorly made anchor can compromise your safety. If you go DIY, make sure you know what you’re doing.
Q: How often should I inspect and maintain my anchor?
A: Inspect your anchor after every use and give it a thorough cleaning at least once a season, depending on how often you use it.
