Mastering the Kayak Launch: From Beaches to Docks and Beyond

Introduction
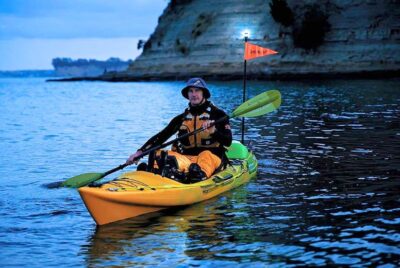
Kayaking, to many, is more than just a sport or a weekend hobby. It’s an exhilarating feeling of freedom, a moment of connection with nature, and an escape from the daily grind. Every glide over the water, every paddle stroke, resonates with the rhythm of nature. But as any seasoned kayaker knows, the journey begins long before hitting the water. It starts with a perfect kayak launch. Why? Because how you begin can often set the tone for the entire adventure.
What Makes a Perfect Launch Spot?
A perfect launch spot is like that secret ingredient in your grandma’s famous recipe—it can truly elevate the experience. Here’s what to look for:
Accessibility: Can I easily get my kayak to the water? Look for spots without too many obstructions.
Water Clarity: It’s easier (and safer) to launch where you can see underwater obstacles.
Gentle Slopes: Especially for beginners, a gradual entry point ensures stability as you get into your kayak.
Safe Surroundings: Watch out for hazards like boat traffic, strong currents, or overhanging trees.
Serene Beauty: Hey, we’re out here for the experience, right? A picturesque setting adds to the joy.
Understanding the Basics of a Kayak Launch
Before you carry your kayak to that dreamy launch spot you’ve just discovered, you need to understand the basics. Launching a kayak isn’t merely about putting it in the water and hopping in. There’s a method to the madness, a rhythm that, when followed, ensures safety and a smooth start.
Different Types of Kayak Launch Points: Beaches, Docks, and Ramps
Beaches: Sandy beaches are ideal, especially for beginners. The soft ground means fewer scratches on your kayak and an easier time getting in and out. However, be wary of waves. Timing is everything.

Docks: These can be a bit tricky. Docks are usually elevated, so you’ll need to be careful while getting into your kayak. The advantage? You can keep half of your body on the dock, ensuring more stability as you lower yourself.
Ramps: Think of ramps as a mix between beaches and docks. They’re inclined surfaces leading to the water, often made of concrete. These are perfect for those who want to launch quickly, especially in areas with a lot of boat traffic.
The Role of Tides & Weather
When it comes to kayaking, Mother Nature has the final say. Understanding her moods can make your kayak launch seamless:
Tides: If you’re launching in tidal waters, the state of the tide can impact your launch. High tides offer more water depth, making it easier to paddle away, while low tides might mean a longer walk with your kayak to reach suitable water.
Weather: A sunny day might seem ideal, but be aware of the wind direction. A strong wind against you can make the initial paddling strenuous. On the flip side, a gusty tailwind can push you out faster than you’re ready for. Always check the weather forecast!
Water Temperature: Especially relevant in colder climates or seasons. Cold water can be a shock to the system and even dangerous. Ensure you’re dressed appropriately.
Safety First: Gear Checklist
Before you even think of launching, ensure you’ve got your gear in place. Remember, it’s better to be over-prepared than under:
Life Jacket/PFD (Personal Flotation Device): Always wear a well-fitted life jacket. It’s not enough to just have it with you—it must be worn at all times. Ensure it’s the right size, and it’s snug but comfortable.
Helmet: Particularly if you’re kayaking in areas with rapids, rocky outcrops, or where there’s a potential for collision, a helmet can be a lifesaver. It protects against head injuries and is especially crucial for whitewater kayakers.
Whistle: A simple, yet critical tool. In case you get into trouble, a whistle can be heard from great distances, much more than shouting can. Attach it to your lifejacket so it’s always within reach.
Paddle Leash: This keeps your paddle attached to your kayak. If you capsize or drop your paddle, you won’t lose it—it’s your primary mode of movement, after all.
Bilge Pump & Sponge: Essential for removing water that may enter the kayak. A bilge pump is useful for larger quantities of water, while a sponge can mop up the remainder.
Spray Skirt: For sit-in kayaks, a spray skirt keeps water out of the cockpit. It’s a barrier against splashing water and can be crucial in rough conditions or colder weather.
Navigation Tools: Always have a waterproof map and compass. Even if you have GPS, these traditional tools don’t require batteries and can be lifesavers if you lose your way.
Throw Rope or Tow Line: Useful for rescues. If someone is in trouble, a throw rope can help pull them to safety.
First Aid Kit: Accidents happen. A waterproof first aid kit equipped with bandages, antiseptics, and any personal medication is a must-have.
Flashlight or Headlamp: If you’re out longer than expected and dusk approaches, you’ll need a light source. Opt for a waterproof variant.
Sun Protection: This includes sunscreen, sunglasses with UV protection, and a hat. Long hours on the water can expose you to harmful UV rays.
Emergency Repair Kit: This kit should include items to repair a puncture in your kayak, a multi-tool, and duct tape. Yes, duct tape—it can temporarily fix a multitude of problems!
Water: Bring along a refillable water bottle, preferably insulated to keep your water cold.
Snacks: As for snacks, opt for energy-rich options that don’t spoil easily, such as energy bars, nuts, or dried fruits. Ensure they’re packed in waterproof containers or zip-lock bags to keep them dry.
Water Purification: If you’re on a longer trip and there’s a chance you might run out of the water you’ve brought along, consider packing water purification tablets or a portable water filter. This way, you can safely replenish your water supply from natural sources without worrying about contaminants.
Remember, while it might seem like a lot, most of these items are compact and lightweight. A well-prepared kayaker is one who can handle unexpected situations, ensuring not just their safety, but also enhancing their enjoyment on the water. Plan according to the length and nature of your trip.
Tips for a Smooth Kayak Launch and Landing
Ensuring a smooth launch and landing of your kayak is essential for both safety and a comfortable experience. Here is a step-by-step guide, where we break down the steps for managing these pivotal moments across various terrains:
Beaches
Launching:
- Position the Kayak: Place the kayak perpendicular to the shoreline, with the bow (front) facing the water partially in the water.
- Secure Your Paddle: Lay your paddle across the kayak behind the cockpit, with one blade resting on the beach.
- Enter the Kayak: Stand alongside the cockpit, use your hands for balance on the side of the kayak, and then sit down, swiftly swinging your legs inside. (For sit-inside kayaks, start by sitting down on the back coaming of the cockpit. Next, swing your legs into the cockpit, sliding them forward.)
- Push Off: Once you’re securely seated, use your hands to push yourself off the beach and into the water until you’re floating.
- Paddle On: With your kayak now floating, grab your paddle, and embark on your adventure.
Landing:
- Approach Slowly: As you near the beach, reduce your speed and approach at a slight angle.
- Use the Paddle: Plant your paddle in the sand underwater to help stabilize and steer the kayak as you get close.
- Exit the Kayak: Before the kayak gets too shallow, swing your legs out and plant your feet firmly on the ground.
- Pull Kayak Ashore: Gently pull your kayak onto the beach to prevent it from floating away.

Docks
Launching:
- Position the Kayak: Align the kayak parallel to the dock, so the cockpit is close to where you’ll be entering from.
- Secure Your Paddle: Place the paddle on the dock within arm’s reach.
- Enter the Kayak: Sitting on the dock with your legs inside the kayak, hold the edges of the dock and lower yourself gently into the cockpit.
- Grab the Paddle: Once settled, pick up the paddle, push away from the dock, and start paddling.
Landing:
- Approach Parallel: Come in parallel to the dock, slowing down your speed as you get closer.
- Hold the Dock: Once alongside, hold onto the dock to stabilize the kayak.
- Exit the Kayak: Shift your weight carefully, swing your legs onto the dock first, and then push yourself up and out of the kayak.
Ramps
Launching:
- Prepare the Kayak: Before placing it on the ramp, ensure your gear is secured and the kayak is balanced.
- Position at Top of Ramp: Start at the top of the ramp, aiming the kayak straight down towards the water.
- Steady Descent: Walk alongside the kayak, guiding it down the ramp using the side handles. Avoid letting it slide on its own.
- Enter the Kayak: Once the kayak is partly in the water, step into the cockpit from the side, sitting down smoothly. (For sit-inside kayaks, start by sitting down on the back coaming of the cockpit. Next, swing your legs into the cockpit, sliding them forward.)
- Push Off: Use the paddle to propel yourself away from the ramp and into open water.
Landing:
- Approach the Ramp: Paddle up to the base of the ramp, coming in straight. Position the kayak so the bow is facing the top of the ramp.
- Exit the Kayak: Safely exit the kayak. Ensure you’re in a position where you won’t slip or where the water isn’t too deep.
- Steady Ascent: Holding the kayak’s side handles, walk it up the ramp. Make sure you have a firm grip to prevent the kayak from sliding or tipping.
- Secure the Kayak: Once you’ve reached a desired point on the ramp, ensure the kayak is secure and won’t slide back down, especially if you need to leave it momentarily.
Remember, the key is practice. The more you familiarize yourself with launching and landing techniques in various terrains, the more confident and skilled you’ll become.
Troubleshooting Common Kayak Launch Challenges
Even the most experienced kayakers face challenges on occasion. The key is preparation and knowing how to handle these hitches:
Dealing with Crowded Launch Points
Summer weekends, public holidays, or just a sunny day can draw crowds to popular launch spots. Arriving early, being patient, and always being courteous can help. And hey, sometimes a little chat with a fellow enthusiast can lead to great kayaking tips or new routes.
Navigating Murky or Rocky Waters
Not all waters are crystal clear. In murky conditions, use a paddle or a stick to gauge depth before stepping in. For rocky conditions, water shoes can protect your feet, and being extra gentle can save your kayak from scratches.
Handling a Kayak Capsize
No matter your experience, the unexpected can occur. First and foremost, stay calm and collected. Grasp your paddle tightly, and if in a group, notify them of your situation. Though kayaks are engineered for balance, should you end up inverted, always put safety first. Make sure conditions are safe before reclaiming your boat.
Conclusion
Launching your kayak might seem like a small step in the grand scheme of your water journey, but it sets the tone for everything that follows. A smooth launch not only ensures safety but also boosts confidence. Whether you’re a seasoned pro or a newbie, every launch teaches something new. So, the next time you’re by the water, take a moment. Breathe in the fresh air, feel the anticipation, and savor the beauty of starting right.
FAQs
Q: Why is choosing the right launch spot so important in kayaking?
A: Choosing the right launch spot ensures a smooth start to your kayaking adventure. Factors like water clarity, slope, accessibility, and surroundings play a crucial role in determining how easy and safe it will be for you to get into the water and begin paddling.
Q: I’ve seen kayakers launch from docks. Isn’t that dangerous due to the height difference?
A: Launching from docks can be a bit tricky due to the elevation. However, many seasoned kayakers prefer them as they provide a clear, obstruction-free entry into the water. The key is to be cautious, use the right technique, and ensure you have a good grip on your paddle for balance.
Q: What should I do if the launch point is too crowded?
A: First, patience is essential. If possible, wait for a clearer spot. Otherwise, consider arriving earlier next time or even seeking out a lesser-known launch point. Always remember to be courteous to fellow enthusiasts.
Q: How do tides affect my kayak launch, especially in coastal areas?
A: Tides can significantly impact your launch. A high tide means more water depth, facilitating an easier paddle out. In contrast, a low tide might require you to walk further with your kayak to find adequate water depth. Always check tidal timings before setting out.
Q: Any quick tips for a solo kayaker launching for the first time?
Absolutely! For solo beginners:
Ensure you have all safety gear on.
Choose a calm day with minimal wind and currents.
Opt for a sandy beach for your first launch.
Take your time, and if you feel uncertain, don’t hesitate to ask for advice or watch others.